Monday, November 30, 2009

Pumpkin cookies and quesadillas

We had a great time with all of our family last week.  Addy sure enjoyed having the extra playmates around. Uncle Ben and Addy enjoyed computer time together.


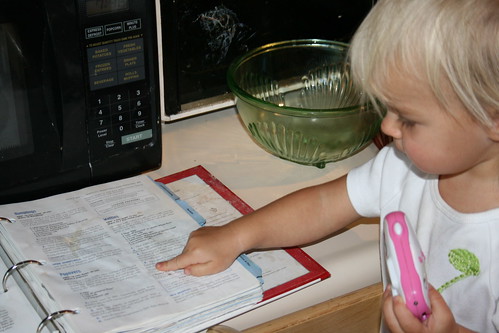
This morning we tried to get back into the routine by baking. We had some pumpkin leftover from pumpkin pancakes which inspired us to try pumpkin cookies.  I figure they've got to be somewhat healthy and they turned out really delicious as well.  Since we didn't have exactly a cup of pumpkin I added some of the leftover roasted sweet potatoes from Thanksgiving dinner.

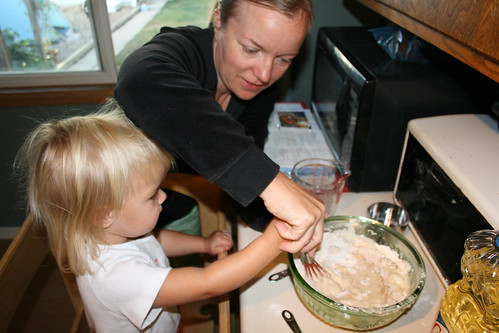
I let Addy do a lot of the scooping today, both measuring and spooning onto the cookie sheet.  She's really getting much more coordinated. It's exciting to watch her move beyond stirring.  Now if I could get her to stop eating the raw ingredients by the handful we have it made.


After we made the cookies we put together cheese and bean quesadillas to serve to the boys for lunch.  Addy  got to spread the beans, sprinkle the cheese and add the top tortilla.  We put them in the fridge to toast after we picked the boys from preschool.  I use a quesadilla maker to toast them but you could also heat them on the stove in a dry pan.  I use refried beans and a mild cheese like Colby jack or cheddar and serve salsa and sour cream on the side for dipping.  I cut them in small wedges using a pizza cutter.


Addy enjoyed "washing" the dishes once we finished our projects.


This recipe comes straight from Betty Crocker's Cookie Jar Cookbook.


Soft Pumpkin Drops

1 cup sugar
1 cup canned pumpkin
1/2 cup shortening
1 TBL grated orange peel
2 cups all purpose flour
1 tsp baking powder
1 tsp baking soda
1 tsp cinnamon
1/4 tsp salt
1/2 cup chocolate chips (or raisins)

Mix wet ingredients, stir in dry ingredients.  Mix in chocolate chips or raisins.  Drop by spoon fulls onto ungreased cookie sheet.  Bake at 375 until light brown, 8 to 10 minutes.  Betty Crocker suggests frosting them but we liked them plain.  Even Chad has eaten several of them tonight and he generally doesn't go for sweets.

Monday, November 23, 2009

Happy Thanksgiving!

We are getting very excited around here for Thanksgiving.  Aunt Marie and Albert and Uncle Ben are arriving after bedtime tonight. Addy has been going around all day saying "I'm so lucky!" or "I'm so excited!". She really can't wait to see them.


We have the house decorated and Addy and I have been shopping and cooking and shopping some more to get ready for the big week. I have a basic menu planned for each day.  It helps me know that we'll have plenty of time to do things with Addy if we aren't worried about shopping or eating.  I'll also know what needs to be done so I can give our guests tasks to help with.

We've done plenty of meatless cooking this week. Rather than include any recipes this time I think I'll just give some links for exploration.  We've made hummus, roasted kale chips, and tonight we'll have gnocchi withh roasted cauliflower for dinner. Addy wasn't sure about the kale chips, but I liked them a lot and we'll try them again with family this week.  She liked the hummus but said it was a little bit spicy.  I think I added more garlic than she liked.  She loved the gnocchi last time we made it.

Have a great week and a wonderful Thanksgiving.

Sunday, November 15, 2009

Meatless Monday-Yummy muffins

It's been a very busy week and I haven't had time to blog. We've done plenty of cooking but I've just been too busy to document it.  


We're back to Monday again so I'll post another Meatless Monday recipe.  These muffins are family favorites.  My mom usually serves them soups and stews.  We've started to really enjoy them for snacks and for a quick addition to the lunch Chad packs each day.  They are super healthy and easy to make as well.  Mom says the recipes probably comes from the 1981 La Leche League cookbook, "Whole Foods for the Whole Family".


La Leche League is a great organization that supports breastfeeding mothers and their families.  I've enjoyed being a member of my local group.  I strongly suggest finding a group if you are expecting or have a baby.  While I'm on the topic of breastfeeding, here is an interesting article that my dad ran across this week.


These muffins would be a great gift for a new nursing mom.  Muffins are quick to make, easy to eat, and these are nutritious too.  I suggest making half the batch regular size muffins and half mini muffins.  The mini muffins are easier for the toddlers to handle and there is less waste.


Recently Addy and I went with some of the friends we made through La Leche League to Rocky Mountain Milling. Now I can make these muffins with fresh, local flour. 


2 cups whole wheat flour
1 tsp baking soda
1/4 brown sugar or honey
1 tsp cinnamon
1/8 tsp ground cloves
1/2 tsp salt
1/2 cup raisins (chopped dried apricots are also great)
1 egg beaten
1 cup buttermilk, yogurt or sour milk (I often use a combo of whatever dairy I need to use up)
3 TBL oil or melted butter (you could substitute an equal amount of applesauce) 


Mix all dry ingredients thoroughly,  including raisins.  Make a well in the center and add the liquids.  Mix just until dry ingredients are moist.   Fill muffin pans half full and bake at 375 for 15 minutes. Mini muffins take about 12 minutes.

Monday, November 9, 2009

Meatless Monday-Easy Bean Soup

This is a quick meatless Monday soup to make that can be easily adjusted for your diners preferences.  I usually keep all the ingredients on hand so that we can make it any time we need to throw a dinner together in a hurry.  My dad developed this when we were growing up.

Addy enjoys using the blender and sampling the beans as we add them.  She would rather eat the beans whole than in a soup so I set out a portion for her before making the soup for us.

It's also a nice warming meal for fall with some cornbread and a salad.


Easy Bean Soup

1 can black beans
1 can kidney beans
2 cups vegetable broth
1 cup salsa
1 cup half/half
optional toppings: jalapeƱos, sour cream, limes, cilantro

Drain beans and blend together with vegetable broth.  I like the salsa chunks in the soup but if you prefer a smoother soup blend the salsa as well.  Pour into sauce pan and heat gently on the stove stirring occasionally. Stir in half and half and heat just to desired serving temperature.  Serve with optional toppings.  Enjoy.

Wednesday, November 4, 2009

Messy Macaroni and Cheese

Once a week I try to fix one meatless meal.  I do this for several reasons.  It started as a way to make sure our meals were diverse and it is often a less expensive way to eat and healthier.  I recently came across this idea of a meatless meal once a week in the blogging world.

Today is not Monday, which is the popular meatless day in the blogs, but I want to share one of our favorite meatless meals;  baked macaroni and cheese, green beans and stewed tomatoes.


Yum, it just makes me think of eating this meal at home growing up.  We always ate these three elements together. My mom recently told me that she learned to put them together from my grandmother.  My grandmother passed away a few weeks ago so it feels good to be thinking of her tonight. Below is a picture taken this summer of four generations who have enjoyed this meal.


Sometimes I use Alton Brown's recipe which is delicious but today I used the Betty Crocker recipe.  It is a little more mild than Alton Brown's and the one we always used growing up.  Addy and I made it this morning and put it in the fridge.  Then about 45 minutes before we wanted to eat I put it in the oven.

Cooking with Addy today was particularly messy.  This was because there isn't much she could do to help other than grate the cheese and then hang out with my while I stirred the white sauce on the stove. But it was also partially my fault. I crushed some crackers for a crunchy top and dropped them all over the stove and floor.  We had to vacuum.

She did well holding the grater very carefully and helping me hold the cheese.  She doesn't have the coordination or the strength to grate by herself but she does have the desire.

Baked Macaroni and Cheese
2 cups uncooked macaroni
1/4 cup butter
1/4 cup all-purpose flour
1/2 tsp salt
1/4 tsp pepper
1/4 tsp ground mustard
1/4 tsp Worcestershire sauce
2 cups milk
2 cups grated or cubed Cheddar cheese plus more of sprinkling on top
1/4 toasted bread crumbs or about 8 Saltine type crackers

Cook noodles as directed.  Melt butter in saucepan then add flour, salt, pepper, ground mustard and Worcestershire sauce. Stir  over low heat until thick and bubbly.  Stir in milk, bring to boil while stirring constantly. Boil and stir 1 minute.  Turn off heat, stir in cheese until melted.  Stir noodles into cheese sauce and pour into a 2 qt. casserole.  Add a layer of grated cheese and then top that with a layer of buttered toasted bread crumbs or cracker crumbs.  I like a sprinkle of Italian seasoning in the cracker crumbs.  Bake at 350 for 20-25 minutes until bubbly.

I hope you enjoy it.  I highly recommend paring this with green beans and stewed tomatoes.

What meatless meals do you enjoy?

Friday, October 30, 2009

Monster Slime!

Here's a cooking craft activity that would be fun any time of year but we did it today to celebrate Halloween with our friends.


This recipe came from a book called Loo-Loo, Boo, and Art You Can Do by Denis Roche.  It is a sweet book written for middle elementary kids who can read and craft on their own.  But when I saw the recipe for "Stinky Clay" I knew we had to try it too.

We renamed the "Stinky Clay" monster slime (this has to be said in a spooking voice for full effect) and spent quite awhile making it and playing with it.


We did this activity sitting around the dining room table.  We took turns stirring, touching, smelling, measuring and pouring.  Then we each got our own to knead to the right consistency.    The kids learned about texture and consistency as we had to keep adding flour to get it just right.  They also learned about colors and coloring mixing.  When Chad asked Addy about the MONSTER SLIME several hours later she told him mostly about the colors we added and what happened to the slime as we added more colors.


This made just the right amount to be split three ways.  If there were more kids I'd double the recipe or do it twice with separate groups so everyone could enjoy!


I didn't get any pictures taken but will try to add some of Addy playing with it tomorrow.    We had to make more on our own to get pictures but it was fun the second time too.

Stinky Clay
3 TBL baking powder
1/2 cup pickle juice or vinegar
1 - 1 1/2 cup of flour
1 TBL vegetable oil
food coloring or poster paint

Put the baking powder in a large bowl.  Add the vinegar/pickle juice.  Watch it fizz!  Mix in the flour and oil until it is soft but not too sticky.  Add colors until it is as ugly as you want it to be.  Ours ended up an appropriate purple-green.  Store it in an airtight container or plastic bag.

Thursday, October 22, 2009

Cinnamon Honey Ice Cream

Ice cream maybe more of a summer time treat but I wanted to share this recipe with you despite the fall weather we've been having.


I make the custard part of this dessert while Addy sleeps or is otherwise occupied.  Once it is cool she helps me mix in the final seasonings, cream and pour it into the ice cream maker.

I recommend using local honey, fresh organic milk and cream and quality eggs.  I think because there are so few ingredients it is important that they be the best you can find.  Local honey also has the added benefit of helping to lessen seasonal allergies.

Making ice cream is a fun family project no matter what kind of ice cream maker you have.  I love our electric one, but the hand crank ones are good fun too.  Addy can begin to learn the states of matter as we watch a liquid turn into a solid.  It is never to early to explain science using the correct terms.  As our librarian reminded us at storytime this morning, if a child has never heard a word, they won't be able to read it or understand it.  Don't skip over words as you read or speak just because you think your child won't understand.  If anything stop and explain the word in other terms but then help them to use the new word as well.


Cinnamon Honey Ice Cream

4 egg yolks
scant 1/2 cup honey
2 cups milk divided
dash of salt
1 cup of cream
1/2 T vanilla
1 tsp. cinnamon

In a small put heavy sauce pan slightly mix the egg yolks, honey, salt, and one cup of the milk.  Slowly heat to just boil over medium heat.  Stir constantly.  Pour into 4 cup measuring cup and refrigerate until cool. Stir in the cream, one more cup of milk, vanilla and cinnamon.  Don't worry if the cinnamon clumps, the ice cream maker will blend it more smoothly.  Pour into ice cream maker and follow the directions for your freezer.  This is best for a 1 qt. ice cream freezer.  After freezing in ice cream maker move ice cream to a freezer safe container and freeze for another hour or two until solid or serve soft serve style direct from the ice cream maker.

In the summer this is great with fresh peaches and an extra drizzle of honey.  I also think it would be great with other fall inspired deserts like apple crisp.

Honestly I usually throw my extra egg whites in the compost but here is a website that can give you more useful suggestions.  http://www.gourmetsleuth.com/leftovereggwhites.htm

Monday, October 12, 2009

The finished product

Here are a couple pictures of our birthday celebration.  The cupcakes and party both turned out great.


Friday, October 9, 2009

Addy's Birthday Party

This week we have been preparing for Addy's 2nd birthday party!  It is truly amazing to look back across these two years of days that we have known our little bug.  She brings such joy to our lives.  We'll celebrate with a party tomorrow afternoon with chili, vegetable soup, and cupcakes.


We spent this morning together making pumpkin cupcakes for her birthday.  Here is the link for the cupcakes.  (Thank you to Mary for her permission to link to her site.)  The only change I made was to add a little milk to the second batch.  Perhaps it is the altitude here but the milk seemed to lighten the texture up just a bit.  Our first batch was a little dense like pumpkin bread.  The second batch came out more cake like.  They taste great either way!  Addy ate two full cupcakes in a row this morning!

While we worked this morning, we focused a lot on counting and singing.  Addy knows a lot of the number order but often skips numbers along the way and usually starts with two. I reinforced starting with one as we measured and scooped our way through the recipe.  I used a 1/2 cup measuring cup rather than a full cup for the flour and the sugar to provide more opportunities to count.

Lately Addy has been picking up new songs and with them new vocabulary like a little sponge.  I want to take advantage of this by singing to her throughout the day.  Here are our new cooking songs:

(sing to Here We Go Round the Mulberry Bush)
This is the way we mix the batter, mix the batter, mix the batter
This is the way we mix the batter so early in the morning.

or

(I can't figure out the original song for this one!  I'll let you know as soon as it comes to me.)
slowly, slowly, stir the flour
slowly, slowly stir the flour
yum, yum, yum, yum, yum

carefully, carefully crack the egg
yum yum yum yum yum

Obviously these are both songs that you can easily change the words to fit your situation.  Songs are a great way to help children through transitions ( ie this is the way we put on our shoes . . . ) and to help them keep focused during a project.  What are your favorite kids songs and how do you like to use them?

Saturday, October 3, 2009

Fall has arrived!

It's Saturday again and we made another big breakfast.  I promise that my next post will not be about breakfast but I couldn't resist trying pumpkin pancakes this morning. They turned out well so I want to share them with you.


Addy has come to expect cooking on weekend mornings. She climbed into her Learning Tower first thing this morning and started to dig into the spice drawer.  Most of the cabinets at her level are still safety latched but I keep the towel drawer, the kids cup drawer and the spice drawer open for her. It definitely provides her with a sense of accomplishment when she can get out what she needs.  The cup and towel drawers are at her level.  She has to be in the tower to get to the spices.


Even if you don't do a lot of cooking with your kids I recommend letting them have some autonomy in the kitchen so that they learn to do things on their own.  Just be clear and realistic with your expectations.  For example, if your child is going through the stage where they have to take everything out of the container and strew it around, only keep a few cups in the drawer.  Otherwise you'll be picking up and washing way too much.  Once they've passed that you can keep the drawer full.

Yesterday we went to a local pumpkin patch with some of our friends.  We didn't pick any pumpkins put we did pose with them for pictures.  Maybe that's why I had pumpkin on the mind this  morning.  These pancakes start with the basic pancake recipe that we like so I'll list that first with the pumpkin addition at the end.  We served them with whipped cream bananas and honey.  I like walnuts on mine but Chad and Addy skipped that part.


The original part of the recipe comes from the Betty Crocker cookbook.

Pancakes
1 large egg
1 cup all-purpose flour/ replace up to half with whole wheat flour
3/4 cup milk
1 TBL brown sugar
2 TBL vegetable oil
3 tsp baking powder
1/2 tsp salt


Beat egg until foamy.  Add the rest of the ingredients and mix until smooth.  (You can use an electric mixer but we use a whisk so Addy can do the stirring safely.)  Let the mixture rest a few minutes while you heat the griddle to medium heat.  When you drop a few drops of water on the griddle they should jump around.  Cook pancakes until bubbles form on the first side then flip until evenly brown.


Pumpkin addition:
After beating the egg until foaming add:
1/3 cup pumpkin puree
1 tsp cinnamon
1/4 tsp allspice
1/4 tsp cloves
grated nutmeg
1 TBL brown sugar


Finish mixing with other ingredients and cook as described above.


What do you do to celebrate fall?

Monday, September 28, 2009

Another Sunday Morning

As I have mentioned, we love breakfast, especially on weekend mornings.  Sometimes we go out for breakfast especially if we attach a hike to it or a trip to the farmer's market.  We like Foolish Craig's Cafe in Boulder and The Egg and I near our house.


We stayed in today and made French toast with whipped cream and golden raspberries.  Yesterday we worked hard at Berry Patch Farms so the berries were delightfully fresh. We came home with 16 pts of raspberries although I'm sure we picked more than that (the missing ones just got eaten before they made it home.)  Berry Patch Farms is USDA organic certified and was a great way to spend a relaxing morning. I think I could have picked berries all day it was so nice out.

I love French toast and I know I'm bragging but I especially love it on the Honey Oatmeal bread we bake.  Addy helps me prepare it make mixing, grating the nutmeg and dipping the bread.  Here she is working on grating the nutmeg. It is really challenging for her but she is getting more dexterous. She wants to do it and is very persistent even though the nutmeg is very hard for her to hold. I make it a little bit easier by propping the grater up in a little skid resistant bowl.  Then we can just dump the grated nutmeg from the bowl into the batter. The grater is sharp but I've reminded her enough times now that she says it before I do.


She is anxious to crack eggs by herself.  However she doesn't have the control yet so she puts her hand over mine and helps that way. I figure that reinforces the amount of force she will need to crack an egg without splattering it all over the place.

One of the tricks I have learned about French Toast is that you need to cook it at a temperature that is low enough that it cooks slowly enough to dry out but high enough to get a nice brown on it.  Today my pan was a little too hot and the outside was done before the inside had really firmed up---still delicious though.

I'm sure just about everyone has their own rendition of French toast.  This is how we've always made it at our house.  I don't usually measure but I tried to estimate amounts as I made it this morning.  This makes enough for 7-8 slices of bread.  I like it cold for a quick snack if there is any leftover, or it heats up fine too.

French Toast
4 eggs
1/2 cup milk
2 TBL sugar or honey
2 tsp vanilla
dash salt
lots of fresh grated nutmeg

Mix all ingredients.  Dip bread and then cook until gently brown on both sides.  Serve with syrup or fresh fruit and whipped cream.


I have to mention that our whipping cream comes from Longmont Dairy Farm.  It is delivered with our milk each Sunday night.  It is so delicious and fresh.

Since my last two posts have been about breakfast, it is obviously on my mind.  I'd love to know what you think about breakfast.  What are your morning breakfast traditions? Do you like to go out for a big breakfast or make one at home?  Where do you like to go?

Thursday, September 24, 2009

Bamper's Waffles


Weekend breakfasts are big around our house.  During the week we eat quick healthy breakfasts but on the weekend we enjoy spending time together in the kitchen creating.  This Sunday we made waffles.
We use the Betty Crocker cookbook and it is the same recipe my dad has always made. My parents go by Bamper and Bammer for now, so we'll call these Bamper's waffles. Chad was in charge of the bacon and the photos, while Addy and I made the waffles, cut the berries and whipped the cream. Addy stayed with us in the kitchen throughout the whole process. 


As she has begun to notice writing in books I have begun to keep the recipes within her reach and ask her to read me the next step.  Obviously she isn't reading yet but knowing the significance of print is a big pre-literacy skill.


We started with the mixing.  She is really getting the hang of careful stirring, especially if I talk her through it.  Telling her how to hold her hands and how quickly/slowly to go.  When the bowl isn't very full I can let her stir on her own and but as we get towards the end of the recipe I like to keep a hand on the bowl.


We replace up to a cup of all purpose flour with whole wheat flour.  It adds health benefits as well as a nice nutty flavor that we like.  You can mix these with a hand mixer but since Addy was helping we just did it all with a whisk.

Bamper's Waffles
2 large eggs
2 cups all-purpose flour
1 3/4 cup milk
1/2 cup vegetable oil
1 TBLS brown sugar
4 tsp. baking powder
1/4 tsp salt

Beat the eggs until fluffy.  Add remaining ingredients and beat until smooth.
Heat waffle iron while you are whipping cream and cutting strawberries.  Our waffle iron takes 2/3 of cup of batter at a time but this may vary depending on the model that you use. You can use the batter later on in the week but I like to make all the waffles and then freeze the extras.  They heat up well in the toaster oven.  The kids devoured the extras for lunch yesterday with plain yoghurt, honey and berries on them.


This time Addy wanted to help cut the berries.  I removed the tops and then she helped chop them using one of her knives.  I think she ate as many as went into the bowl.
Our breakfast was delicious and gave us plenty of energy for the rest of the morning.  Here is Addy playing "secret garden" in our back yard.


Monday, September 14, 2009

Our Weekly Bread

Since moving to Colorado and not having to return to work I have found the time and the inclination to bake our own bread.  Or maybe it is just because I love using my Kitchen Aid stand mixer.  Either way I know that Addy really enjoys helping make bread.  We make a yummy honey oatmeal recipe once a week and occasionally other types of bread. I like the idea of homemade bread because there are no additives and I can make it organic without paying the high price of natural bread.  I create less waste because we can reuse the bread bags.

This is definitely one of the times that I have to suspend my desire for a clean kitchen.  Making bread with a toddler is MESSY.  However the learning that she does and the finished product make it totally worth it.  Addy loves to taste all of the ingredients.  I usually give her a tiny taste of each as they go in, but I have to watch the flour because she would eat it by the handful.  She usually ends up with a fine coating of it anyways.  She is just getting to the point where she can roll out the dough and is starting to try to shape the loaves.

I have found that although this recipe may turn out best when it is followed pretty closely there is some room for flexibility.  For instance the rising times often are shorter or longer than recommended but the bread still turns out tasty if not beautiful.  This past week we made the dough then went for our run.  We stopped at the park on the way home and the bread rose for over an hour and a half on the first rise.  By then we were pushing it to get it baked by the time we had to leave the house for the day so I only let is rise about 30 minutes for the second rise.  It worked, they aren't the lightest fluffiest loaves we've had but they ended up a nice shape.  I also just let it rise in the first time in the bowl I made it in rather than greasing a clean bowl as recommended.

When we first started making our own bread we went through it more quickly.  Now that we are used to it we go through about two loaves a week.  I store one in the freezer and then defrost it on the counter when we need it.

I've just started looking for a local source of flour but currently I just use whatever organic brand is on sale.  I use local honey and good quality butter and oats.

This recipe came from the cookbook that came with my Kitchen Aid.

Honey Oatmeal Bread
1/3 cup unsalted butter
1 1/2 cup water
1/2 cup honey
1 cup organic whole wheat flour
4-5 cups organic white flour
1 cup oatmeal
2 tsps salt
2 packages yeast or 4 1/2 tsps.
2 eggs

Heat the butter, honey and water together over low heat until 120-130 degrees.  Use a thermometer!   Otherwise you risk not allowing the yeast the proper environment.  Put the oatmeal, whole wheat flour, 3 cups of white flour, salt and yeast in the mixer bowl.  With the dough hook on, mix on stir setting for 15 seconds. Slowly add liquids and mix for about a minute.  Add eggs one at a time until incorporated.  While mixing on level 2 slowly add the rest of the white flour about a 1/2 cup at a time until the dough pulls away from the sides of the bowl and clings to the dough hook. That should take about 2 minutes.  Then knead on level 2 for two more minutes.  Scrape sides of bowl clean and form dough into a nice ball.  Place in a cold oven and allow to rise for about an hour.  Dump onto lightly floured surface.  Divide evenly.  Roll out into a rectangle and then roll up into a log tucking the ends under.  Place in lightly greased bread pans. Put back into cold oven to allow to rise again for about an hour.  Turn convection oven to 350 and set timer for 30 minutes.  You don't have to take the loaves out while the oven heats, just leave them in there.

You could make this recipe without a stand mixer.  Just read a recipe for making bread by hand and follow those instructions using these ingredients.

French Toast made with this bread is awesome!

Tuesday, September 8, 2009

Fresh from the garden pesto

Lest you think we only bake here, today we made pesto.  After a quick run and some playtime at the park Addy and I hit the garden.  We picked all the basil and stripped the leaves from the stems.  Addy helped pick and pluck for awhile and then went off to draw with chalk.  Although her figures are just lines, today was the first time I heard her talking about what she was drawing without me prompting.  It was nice to sit beside her with my hands busy but my ears open to what she was contemplating.  We were able to really take the morning at her pace even while getting a task accomplished from my list.  I find that it really helps her behave well if part of the day she gets to set the pace.  Since we had a busy afternoon planned I made sure to follow her lead this morning.

About the time I was done stripping the basil, she was ready to head in for a snack.  She ate a popsicle made from this morning's smoothies while I toasted pine nuts and walnuts together just until they had just a little more color.  Then she helped me with the blender.  We chunked the Parmesan cheese into it and grated it up then poured it out into a separate bowl to be able to measure it for the multiple batches.  Then we ground up the nuts in the blender and dumped them into their own bowl as well.  I think this would be easier to make in a food processor but I don't know since I don't actually have one.  My blender had to work pretty hard to make the thick paste that I like.  However it did persevere and we were able to make 3 batches of pesto using up all the basil.  Each batch makes enough for two pasta meals so I froze 5 small bags of pesto and saved one portion for tonight's dinner.

While we made the pesto Addy tasted and smelled each ingredient.  She didn't like the cheese but did enjoy the walnuts.  She liked the smell of the basil but said the garlic was too spicy.  As a whole though she likes pesto.  She enjoyed it fresh on some pretzels this morning and really gobbled it up on the ravioli tonight.  This is another example of how she gets to use her five senses while cooking.  With older children you can talk about senses and the science behind them as you cook.

Basil Pesto:

2 cups packed fresh basil
1/2 cup walnuts or pine nuts or a combination
1/2 cup grated Parmesan cheese
1/3 cup olive oil (if your blender balks you can always add a little bit more oil)
2-4 cloves of garlic (our garlic is a little on the small side so we used four cloves)
salt to taste

Blend until smooth. Refrigerate or freeze.  When you serve it with pasta you can stir in some of the pasta cooking water to make it more saucy.  It does tend to oxidize so cover with plastic wrap touching the surface if you are storing it in a bowl or smooth all of the air out if you are storing it in a baggy.

Thursday, September 3, 2009

More muffins

This week has been pretty busy. We haven't done a lot of cooking but we did make some of those banana muffins yesterday. The new boys we are watching also like to cook and devoured the muffins in no time flat. They could hardly wait for them to cool down. The older boy helped me mix them up while the younger boy and Addy were sleeping. We talked about patterns as he put the muffin liners in the pan. We have three different color liners and he organized them in a pattern.  The younger kids woke up just in time to help with sprinkling some sugar on top.  I cannot emphasize enough how cooking helps kids learn turn taking.  The turns are short (pour once, sprinkle one muffin, scoop once, etc.) and the gratification instant.

Here is another muffin recipe we like. This recipe fills our mini muffin tin once and 2-3 small loaf pans.  I use small loaf pans that hold 1 cup liquid. The small loaves freeze very well and make great hostess gifts or quick snacks if you have an unexpected play date.  Just defrost for a couple of minutes in the microwave and then leave at room temperature for about 15 minutes and they'll be ready to go.  I just stick them in a quart size freezer bag.  This recipe also works well with pumpkin.  Just add a 16 oz. can of pumpkin instead of the zucchini.

This recipe is adapted from Betty Crocker's New Cookbook.

Zucchini Muffins/Bread 
3 cups shredded zucchini (3 medium)
1 2/3 cups sugar
1/3 cup oil
1/3 cup applesauce
2 tsps vanilla
4 eggs
3 cups flour
2 tsp. baking soda
1 tsp. salt
1 tsp. cinnamon
1/2 tsp. ground cloves
1/2 tsp. baking powder
Preheat oven to 375.
1. Mix zucchini, sugar, oil, applesauce, vanilla and eggs in large bowl. (really use a LARGE bowl, I always start off too small and have to dump it all in a larger bowl to be able to stir without spilling).  Stir in remaining ingredients.  Some people like raisins or chopped nuts in this type of bread, feel free to add these.  
2.  Line mini-muffin pan, grease bottoms only of small loaf pans.  Fill muffin tins and loaf pans about 2/3 full.
I put the mini muffin pan on the top rack and the loaves below.  Set the timer for 12 minutes.  Check the muffins if they are firm to the touch take them out and lower oven temp to 350, reset the timer for 20 minutes. Our muffins are done by 12 minutes, but if they weren't I would leave it at 375 until they were done and subtract that time from the remaining time for the small loaves.

Friday, August 28, 2009

"I want to cook."


Yesterday Addy and I spent the day here at home with her cousin. He'll be three in a few months. After nap as we are just getting ourselves together and planning the rest of the afternoon I ask them what they want to do. After a few suggestions from me, Braden adamantly announces he wants to cook. Well good. We'll cook then. I give him a few choices of what we could make based on the ingredients available. He picks chocolate chip cookies. Now I do feel somewhat guilty about making such a sweet project but ultimately the kids like baking and there are plenty of steps for turn taking and ingredients for tasting, touching, and smelling.

It took me a while after moving here to find a recipe that didn't fall flat. For me the "tried and true" recipe on the back of the chocolate chip bag just couldn't handle the altitude. The recipe below is a based mostly on the recipe on the shortening container. I don't like to use a lot of shortening for health and flavor reasons but I think it makes the cookies stay a nicer shape and texture. There is more flour in my version than the original version. I find that I need it unless I want a really flat cookie.

Chocolate Chip Cookies:

preheat convection oven to 350 or regular oven to 375

2 1/2 cup flour
1 tsp salt
3/4 tsp baking soda
1/4 cup butter flavored shortening
1/2 cup unsalted butter
1 1/4 cup brown sugar
1 egg
1 TBLS vanilla
2 TBLS milk
1 1/2 cup chocolate chips (substitute part of this with nuts if you like them)

Sift the dry ingredients together and set aside. Cream together the butter and shortening. Add the sugar and beat until fluffy. Add the egg, vanilla and milk and beat until combined. Stir in the chocolate chips/nuts. Bake for 8 minutes for a chewy cookie and 10 for a crunchy cookie. Keep the dough in the fridge in between pans. This way it stays firmer and it isn't so tempting to eat as when it is just sitting on the counter.

The kids really got into taking turns yesterday as well as smelling and touching each ingredient. We also compared the different sizes of measuring spoons and how much of each ingredient we needed. We touched on science concepts as they watched the lumps of dough melt into cookie shapes in the oven. We had fruit and yogurt for snack and then a cookie for dessert. Each kid was happy with just one cookie so I think it really was the process more than the product that Braden was asking for.

Monday, August 24, 2009

Morning Smoothies or Popsicles

This morning was definitely a smoothie morning. You can tell when it's time for a smoothie breakfast if it is already getting warm when you let your dog out into the yard.

This recipe is less about the amounts and more about the order of things. So with Addy I tell her the steps before we start and then see if she can help me remember all of the ingredients as we go along. Then of course I let her press the button on the mixer. This accomplishes a couple things. First if the noise is a surprise it scares both her and the dog. If Addy presses the button only Suka gets startled. It also helps with her fine motor skills and hand strength as the buttons are pretty tight on our blender. I bet all toddlers love to press buttons and this lets her see, hear, and taste the outcome of her button pushing.

We have used this "recipe" for a few years now. It originally came from a pamphlet about cooking with honey from the Indiana Beekeepers Association. This fills two large glasses and a small sippy cup or bowl for Addy.

1. fill blender half way with frozen fruit of your choice (it was strawberries for us this morning)-frozen fruit means you have a nice cold smoothie and didn't have to add ice
2. drop in frozen banana-fresh will do here and allows for more hand eye coordination development as Addy had to break the banana and then reach up and drop each piece into the blender
3. a large dollop of yogurt-we like vanilla yogurt in the smoothie but you could always add a splash of vanilla and plain yogurt
4. a dollop of honey
5. add a milk of your choice to the 5 cup line (soy milk is great in smoothies)
6. blend until smooth

We had ours with a piece of toast to make a balanced and filling breakfast. Sometimes I add nutritional boosters like flax or brewer's yeast flakes. We didn't have any on hand so we skipped that step today.

If you don't want them for breakfast or have some left over, pour them into popsicle molds, freeze and enjoy. Addy sometimes doesn't like yogurt but I've found that she loves popsicles made with yogurt. Often I'll just mash some fruit into plain yogurt add a little honey and cinnamon and freeze that for her. She loves it and it is a great way to get more nutrients into her snacks.

Thursday, August 20, 2009

Starting Points

I've always enjoyed cooking and pretty much had Addy cooking with me once she could stand up on her own. Before that she was often in the pouch on my back while I cooked.

Here are a few things I've learned from our kitchen time:

1. Make sure your young helpers can comfortably and safely reach.
We started just using a stool or a chair to be able to reach the counter. That quickly became too precarious. We love our Learning Tower. It is adjustable and sturdy. There is room for two or even three kids on it and I can slide it around the kitchen. When she isn't cooking, Addy keeps it by the window. Then she can keep her eye on Suka and the cats or play underneath it. Kylan can stand on it to help wash dishes. It has been totally worth the expense. You can buy them new or watch for them on Craigslist. I saw a couple on there recently for about $60 less than I spent.

2. Forget about the mess. I just don't worry if she sloshes stuff out of the bowl or drops it on the floor. I try to give her advice or demonstrate how to stir or pour more carefully but she's still learning. I keep kitchen towels in a drawer that she can reach so when we're done cooking she can grab one and help clean up. I also use 1:4 vinegar to water plus a couple of drops of tea tree oil to wipe the counters with. That way not only is our cleaning solution better for the environment but if one of the kids comes in contact with it it isn't a big deal.

3. Relax about precision. Although we talk about measuring a lot and usually cook from a recipe I've learned that if not all the flour or what have you makes it into the final product it isn't the end of the world. The best coffee cake I ever made was missing an unknown quantity of the dry ingredients thanks to some enthusiastic stirring and it still rose and tasted delicious. That recipe has never come out as tasty.

4. It probably doesn't need mentioning but I'll say it anyways: Go with the flow. As all parents know, just because you think it is time to do something doesn't mean your toddler agrees. If Addy starts out strong but loses interest half way through a creation I just let her go do her thing or help her get started on something else and finish up on my own. Usually she'll still hang out in the kitchen with me and I'll just continue to narrate to her what I'm doing. That way she's still picking up on the vocabulary and doesn't feel that I'm ignoring her.

Here's a link to the coffee cake. Sour Cream Coffee Cake I suggest adding finely chopped peeled apples to the middle portion of streusel.

Wednesday, August 19, 2009

Banana muffins

Occasionally I watch my nephews who are almost 3 and 5. When they are here, one of our favorite things to do in the afternoon is make our own snack.

These banana muffins are a big hit with all of us and there is a range of difficulty to the steps so everyone can take a turn that interests them. Addy and Braden enjoy the challenge of one-to-one correspondence while putting the muffin papers in the muffin pan. Kylan enjoys the precision needed to crack the egg and sift the dry ingredients together.

These muffins are super healthy too. Made with whole wheat flour and applesauce; they are low in fat and high in fiber.

Preheat convection oven to 350
Ingredients:
1 egg
1/3 cup packed brown sugar
1 tsp vanilla
1 ripe banana (use a very brown smooshy banana)
1/4 cup applesauce
2/3 cup whole wheat flour
1/2 tsp baking powder
1/2 tp baking soda
pinch salt
1/2 tsp cinnamon

Line the muffin tins. We usually end up with 12 regular sized muffins or about 20 mini muffins.

In a large bowl whisk the egg, vanilla and the brown sugar together. In a separate bowl mash the banana with a fork and then add to the sugar mixture with the applesauce. Using a strainer or sifter sift the flour, baking powder, soda, salt and cinnamon together over the sugar mixture. You will probably have some of the whole wheat left in the strainer. Add this to the bowl as well. Stir gently until moist. Spoon into muffin liners. Fill just over half full. Add sprinkles or a slice of fresh banana to decorate. Bake for 12-14 minutes.

The mini muffins make great snacks to take along to the park. Chad taught her to eat a whole one in one bite.