Monday, September 28, 2009

Another Sunday Morning

As I have mentioned, we love breakfast, especially on weekend mornings.  Sometimes we go out for breakfast especially if we attach a hike to it or a trip to the farmer's market.  We like Foolish Craig's Cafe in Boulder and The Egg and I near our house.


We stayed in today and made French toast with whipped cream and golden raspberries.  Yesterday we worked hard at Berry Patch Farms so the berries were delightfully fresh. We came home with 16 pts of raspberries although I'm sure we picked more than that (the missing ones just got eaten before they made it home.)  Berry Patch Farms is USDA organic certified and was a great way to spend a relaxing morning. I think I could have picked berries all day it was so nice out.

I love French toast and I know I'm bragging but I especially love it on the Honey Oatmeal bread we bake.  Addy helps me prepare it make mixing, grating the nutmeg and dipping the bread.  Here she is working on grating the nutmeg. It is really challenging for her but she is getting more dexterous. She wants to do it and is very persistent even though the nutmeg is very hard for her to hold. I make it a little bit easier by propping the grater up in a little skid resistant bowl.  Then we can just dump the grated nutmeg from the bowl into the batter. The grater is sharp but I've reminded her enough times now that she says it before I do.


She is anxious to crack eggs by herself.  However she doesn't have the control yet so she puts her hand over mine and helps that way. I figure that reinforces the amount of force she will need to crack an egg without splattering it all over the place.

One of the tricks I have learned about French Toast is that you need to cook it at a temperature that is low enough that it cooks slowly enough to dry out but high enough to get a nice brown on it.  Today my pan was a little too hot and the outside was done before the inside had really firmed up---still delicious though.

I'm sure just about everyone has their own rendition of French toast.  This is how we've always made it at our house.  I don't usually measure but I tried to estimate amounts as I made it this morning.  This makes enough for 7-8 slices of bread.  I like it cold for a quick snack if there is any leftover, or it heats up fine too.

French Toast
4 eggs
1/2 cup milk
2 TBL sugar or honey
2 tsp vanilla
dash salt
lots of fresh grated nutmeg

Mix all ingredients.  Dip bread and then cook until gently brown on both sides.  Serve with syrup or fresh fruit and whipped cream.


I have to mention that our whipping cream comes from Longmont Dairy Farm.  It is delivered with our milk each Sunday night.  It is so delicious and fresh.

Since my last two posts have been about breakfast, it is obviously on my mind.  I'd love to know what you think about breakfast.  What are your morning breakfast traditions? Do you like to go out for a big breakfast or make one at home?  Where do you like to go?

Thursday, September 24, 2009

Bamper's Waffles


Weekend breakfasts are big around our house.  During the week we eat quick healthy breakfasts but on the weekend we enjoy spending time together in the kitchen creating.  This Sunday we made waffles.
We use the Betty Crocker cookbook and it is the same recipe my dad has always made. My parents go by Bamper and Bammer for now, so we'll call these Bamper's waffles. Chad was in charge of the bacon and the photos, while Addy and I made the waffles, cut the berries and whipped the cream. Addy stayed with us in the kitchen throughout the whole process. 


As she has begun to notice writing in books I have begun to keep the recipes within her reach and ask her to read me the next step.  Obviously she isn't reading yet but knowing the significance of print is a big pre-literacy skill.


We started with the mixing.  She is really getting the hang of careful stirring, especially if I talk her through it.  Telling her how to hold her hands and how quickly/slowly to go.  When the bowl isn't very full I can let her stir on her own and but as we get towards the end of the recipe I like to keep a hand on the bowl.


We replace up to a cup of all purpose flour with whole wheat flour.  It adds health benefits as well as a nice nutty flavor that we like.  You can mix these with a hand mixer but since Addy was helping we just did it all with a whisk.

Bamper's Waffles
2 large eggs
2 cups all-purpose flour
1 3/4 cup milk
1/2 cup vegetable oil
1 TBLS brown sugar
4 tsp. baking powder
1/4 tsp salt

Beat the eggs until fluffy.  Add remaining ingredients and beat until smooth.
Heat waffle iron while you are whipping cream and cutting strawberries.  Our waffle iron takes 2/3 of cup of batter at a time but this may vary depending on the model that you use. You can use the batter later on in the week but I like to make all the waffles and then freeze the extras.  They heat up well in the toaster oven.  The kids devoured the extras for lunch yesterday with plain yoghurt, honey and berries on them.


This time Addy wanted to help cut the berries.  I removed the tops and then she helped chop them using one of her knives.  I think she ate as many as went into the bowl.
Our breakfast was delicious and gave us plenty of energy for the rest of the morning.  Here is Addy playing "secret garden" in our back yard.


Monday, September 14, 2009

Our Weekly Bread

Since moving to Colorado and not having to return to work I have found the time and the inclination to bake our own bread.  Or maybe it is just because I love using my Kitchen Aid stand mixer.  Either way I know that Addy really enjoys helping make bread.  We make a yummy honey oatmeal recipe once a week and occasionally other types of bread. I like the idea of homemade bread because there are no additives and I can make it organic without paying the high price of natural bread.  I create less waste because we can reuse the bread bags.

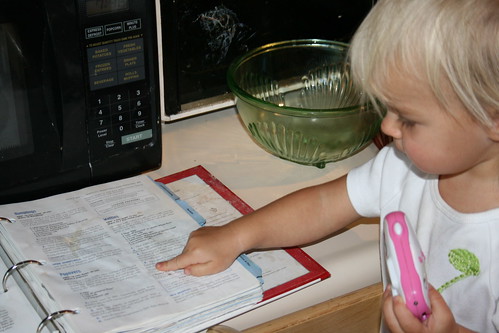
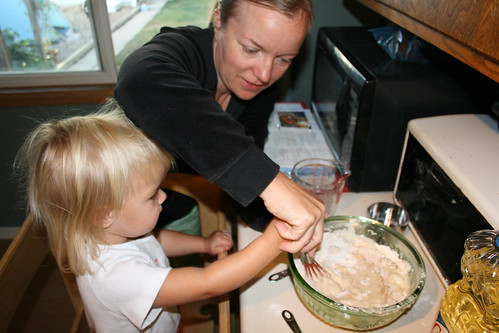
This is definitely one of the times that I have to suspend my desire for a clean kitchen.  Making bread with a toddler is MESSY.  However the learning that she does and the finished product make it totally worth it.  Addy loves to taste all of the ingredients.  I usually give her a tiny taste of each as they go in, but I have to watch the flour because she would eat it by the handful.  She usually ends up with a fine coating of it anyways.  She is just getting to the point where she can roll out the dough and is starting to try to shape the loaves.

I have found that although this recipe may turn out best when it is followed pretty closely there is some room for flexibility.  For instance the rising times often are shorter or longer than recommended but the bread still turns out tasty if not beautiful.  This past week we made the dough then went for our run.  We stopped at the park on the way home and the bread rose for over an hour and a half on the first rise.  By then we were pushing it to get it baked by the time we had to leave the house for the day so I only let is rise about 30 minutes for the second rise.  It worked, they aren't the lightest fluffiest loaves we've had but they ended up a nice shape.  I also just let it rise in the first time in the bowl I made it in rather than greasing a clean bowl as recommended.

When we first started making our own bread we went through it more quickly.  Now that we are used to it we go through about two loaves a week.  I store one in the freezer and then defrost it on the counter when we need it.

I've just started looking for a local source of flour but currently I just use whatever organic brand is on sale.  I use local honey and good quality butter and oats.

This recipe came from the cookbook that came with my Kitchen Aid.

Honey Oatmeal Bread
1/3 cup unsalted butter
1 1/2 cup water
1/2 cup honey
1 cup organic whole wheat flour
4-5 cups organic white flour
1 cup oatmeal
2 tsps salt
2 packages yeast or 4 1/2 tsps.
2 eggs

Heat the butter, honey and water together over low heat until 120-130 degrees.  Use a thermometer!   Otherwise you risk not allowing the yeast the proper environment.  Put the oatmeal, whole wheat flour, 3 cups of white flour, salt and yeast in the mixer bowl.  With the dough hook on, mix on stir setting for 15 seconds. Slowly add liquids and mix for about a minute.  Add eggs one at a time until incorporated.  While mixing on level 2 slowly add the rest of the white flour about a 1/2 cup at a time until the dough pulls away from the sides of the bowl and clings to the dough hook. That should take about 2 minutes.  Then knead on level 2 for two more minutes.  Scrape sides of bowl clean and form dough into a nice ball.  Place in a cold oven and allow to rise for about an hour.  Dump onto lightly floured surface.  Divide evenly.  Roll out into a rectangle and then roll up into a log tucking the ends under.  Place in lightly greased bread pans. Put back into cold oven to allow to rise again for about an hour.  Turn convection oven to 350 and set timer for 30 minutes.  You don't have to take the loaves out while the oven heats, just leave them in there.

You could make this recipe without a stand mixer.  Just read a recipe for making bread by hand and follow those instructions using these ingredients.

French Toast made with this bread is awesome!

Tuesday, September 8, 2009

Fresh from the garden pesto

Lest you think we only bake here, today we made pesto.  After a quick run and some playtime at the park Addy and I hit the garden.  We picked all the basil and stripped the leaves from the stems.  Addy helped pick and pluck for awhile and then went off to draw with chalk.  Although her figures are just lines, today was the first time I heard her talking about what she was drawing without me prompting.  It was nice to sit beside her with my hands busy but my ears open to what she was contemplating.  We were able to really take the morning at her pace even while getting a task accomplished from my list.  I find that it really helps her behave well if part of the day she gets to set the pace.  Since we had a busy afternoon planned I made sure to follow her lead this morning.

About the time I was done stripping the basil, she was ready to head in for a snack.  She ate a popsicle made from this morning's smoothies while I toasted pine nuts and walnuts together just until they had just a little more color.  Then she helped me with the blender.  We chunked the Parmesan cheese into it and grated it up then poured it out into a separate bowl to be able to measure it for the multiple batches.  Then we ground up the nuts in the blender and dumped them into their own bowl as well.  I think this would be easier to make in a food processor but I don't know since I don't actually have one.  My blender had to work pretty hard to make the thick paste that I like.  However it did persevere and we were able to make 3 batches of pesto using up all the basil.  Each batch makes enough for two pasta meals so I froze 5 small bags of pesto and saved one portion for tonight's dinner.

While we made the pesto Addy tasted and smelled each ingredient.  She didn't like the cheese but did enjoy the walnuts.  She liked the smell of the basil but said the garlic was too spicy.  As a whole though she likes pesto.  She enjoyed it fresh on some pretzels this morning and really gobbled it up on the ravioli tonight.  This is another example of how she gets to use her five senses while cooking.  With older children you can talk about senses and the science behind them as you cook.

Basil Pesto:

2 cups packed fresh basil
1/2 cup walnuts or pine nuts or a combination
1/2 cup grated Parmesan cheese
1/3 cup olive oil (if your blender balks you can always add a little bit more oil)
2-4 cloves of garlic (our garlic is a little on the small side so we used four cloves)
salt to taste

Blend until smooth. Refrigerate or freeze.  When you serve it with pasta you can stir in some of the pasta cooking water to make it more saucy.  It does tend to oxidize so cover with plastic wrap touching the surface if you are storing it in a bowl or smooth all of the air out if you are storing it in a baggy.

Thursday, September 3, 2009

More muffins

This week has been pretty busy. We haven't done a lot of cooking but we did make some of those banana muffins yesterday. The new boys we are watching also like to cook and devoured the muffins in no time flat. They could hardly wait for them to cool down. The older boy helped me mix them up while the younger boy and Addy were sleeping. We talked about patterns as he put the muffin liners in the pan. We have three different color liners and he organized them in a pattern.  The younger kids woke up just in time to help with sprinkling some sugar on top.  I cannot emphasize enough how cooking helps kids learn turn taking.  The turns are short (pour once, sprinkle one muffin, scoop once, etc.) and the gratification instant.

Here is another muffin recipe we like. This recipe fills our mini muffin tin once and 2-3 small loaf pans.  I use small loaf pans that hold 1 cup liquid. The small loaves freeze very well and make great hostess gifts or quick snacks if you have an unexpected play date.  Just defrost for a couple of minutes in the microwave and then leave at room temperature for about 15 minutes and they'll be ready to go.  I just stick them in a quart size freezer bag.  This recipe also works well with pumpkin.  Just add a 16 oz. can of pumpkin instead of the zucchini.

This recipe is adapted from Betty Crocker's New Cookbook.

Zucchini Muffins/Bread 
3 cups shredded zucchini (3 medium)
1 2/3 cups sugar
1/3 cup oil
1/3 cup applesauce
2 tsps vanilla
4 eggs
3 cups flour
2 tsp. baking soda
1 tsp. salt
1 tsp. cinnamon
1/2 tsp. ground cloves
1/2 tsp. baking powder
Preheat oven to 375.
1. Mix zucchini, sugar, oil, applesauce, vanilla and eggs in large bowl. (really use a LARGE bowl, I always start off too small and have to dump it all in a larger bowl to be able to stir without spilling).  Stir in remaining ingredients.  Some people like raisins or chopped nuts in this type of bread, feel free to add these.  
2.  Line mini-muffin pan, grease bottoms only of small loaf pans.  Fill muffin tins and loaf pans about 2/3 full.
I put the mini muffin pan on the top rack and the loaves below.  Set the timer for 12 minutes.  Check the muffins if they are firm to the touch take them out and lower oven temp to 350, reset the timer for 20 minutes. Our muffins are done by 12 minutes, but if they weren't I would leave it at 375 until they were done and subtract that time from the remaining time for the small loaves.