Showing posts with label cooking with toddlers. Show all posts

Wednesday, January 4, 2012

Another Guest Post! No, I'm not being lazy . . . I just have good friends!

This post is by my friend Nichol. Nichol and I met at Indiana University during graduate school.  We were in the same program and had almost every class together.  


Sunday, January 1, 2012

On a roll in 2012!

I am the mother of two toddlers. One of whom is allergic to eggs, milk, peanuts, tree nuts, and red dye 40. In addition to having a daughter with food allergies, I have a brother who shares my daughter’s peanut and tree nut allergies but is also allergic to soy.  It can be very challenging to come up with new recipes lacking egg, milk, peanuts, tree nuts, and red dye 40.  Let alone a new recipe lacking soy and milk products.

Finding a store bought bread or roll to accommodate my brother and daughter’s allergies is almost impossible.  Let’s not even talk about the taste of the products we have found. My brother sadly has resorted to rolling his hot dogs or hamburgers in what looked like a piece of paper in the shape of a tortilla. As his older sister, I needed to put a stop to this.  We have successfully been making Ava and Kyle friendly bread and pizza dough so I thought there must be a tasty way to make safe rolls. After experimenting for some time, last night, New Years Eve was a successful attempt in our roll making endeavor.

2012 will now bring many occasions to use this yummy roll recipe.  Bring on the family celebrations and Superbowl Sunday with hamburger sliders, meatball subs, and lunch meat subs!


Hamburger Rolls: Egg, Milk, Soy, Peanut, Tree Nut Free.
Recipe makes 6 Hamburger Rolls.
Approximate time to complete: 5 ½ hours by hand, 3 hours by bread machine

*Only you and your allergist know what ingredients are safe for you.  Please be sure to check all labels.  You never know where an allergen could be hiding.  Last year I purchased a different brand of cinnamon than our family typically uses.  As always I checked the label before pouring it into some cookie batter.  The label read “may contain traces of egg.”  Who would have thought traces of egg could be in cinnamon?!  

Ingredients:
2 cups flour divided
1 cup warm 100F water
2 ½ tsp active dry yeast
½ cup quick cooking oats
2 tbsp brown sugar
1 ½ tsp salt
2T canola oil

Directions:
  1. Combine 1 cup flour, water and yeast in a large glass bowl and stir well with a large plastic spoon.  
  2. Cover the bowl with a clean kitchen towel and let the mixture sit for 1 ½  hours.  
  3. Stir in the other cup of flour, oats, brown sugar, salt, and oil.
  4. Place dough on lightly floured cutting board and knead for approximately 6 minutes.  Adding extra flour as needed.  
  5. Place dough in a lightly greased glass bowl.  Cover with a clean kitchen towel until the dough doubles in size.  This will take approximately 2 hours.
  6. Roll out dough on lightly floured cutting board.
  7. Shape dough into 6 equal size rolls using a glass cup or cookie cutter.  
  8. Place all 6 rolls on a baking sheet lined with parchment paper.
  9. Cover the rolls with a clean kitchen towel for approximately 1 hour.
  10. Preheat the oven to 375F.
  11. Bake rolls 20 minutes.
  12. Cool.


*To make in the bread machine pour the water and canola oil in the bread pan first.  Then add the flour, oats, brown sugar, and salt.  Make a small indent with your finger and pour in the yeast making sure the yeast does not touch any of the liquid ingredients.  Press the dough setting on your machine.  Our bread machine dough setting runs for 1 ½ hours. Once the dough setting is complete follow above directions starting at step 6.

Wednesday, November 4, 2009

Messy Macaroni and Cheese

Once a week I try to fix one meatless meal.  I do this for several reasons.  It started as a way to make sure our meals were diverse and it is often a less expensive way to eat and healthier.  I recently came across this idea of a meatless meal once a week in the blogging world.

Today is not Monday, which is the popular meatless day in the blogs, but I want to share one of our favorite meatless meals;  baked macaroni and cheese, green beans and stewed tomatoes.


Yum, it just makes me think of eating this meal at home growing up.  We always ate these three elements together. My mom recently told me that she learned to put them together from my grandmother.  My grandmother passed away a few weeks ago so it feels good to be thinking of her tonight. Below is a picture taken this summer of four generations who have enjoyed this meal.


Sometimes I use Alton Brown's recipe which is delicious but today I used the Betty Crocker recipe.  It is a little more mild than Alton Brown's and the one we always used growing up.  Addy and I made it this morning and put it in the fridge.  Then about 45 minutes before we wanted to eat I put it in the oven.

Cooking with Addy today was particularly messy.  This was because there isn't much she could do to help other than grate the cheese and then hang out with my while I stirred the white sauce on the stove. But it was also partially my fault. I crushed some crackers for a crunchy top and dropped them all over the stove and floor.  We had to vacuum.

She did well holding the grater very carefully and helping me hold the cheese.  She doesn't have the coordination or the strength to grate by herself but she does have the desire.

Baked Macaroni and Cheese
2 cups uncooked macaroni
1/4 cup butter
1/4 cup all-purpose flour
1/2 tsp salt
1/4 tsp pepper
1/4 tsp ground mustard
1/4 tsp Worcestershire sauce
2 cups milk
2 cups grated or cubed Cheddar cheese plus more of sprinkling on top
1/4 toasted bread crumbs or about 8 Saltine type crackers

Cook noodles as directed.  Melt butter in saucepan then add flour, salt, pepper, ground mustard and Worcestershire sauce. Stir  over low heat until thick and bubbly.  Stir in milk, bring to boil while stirring constantly. Boil and stir 1 minute.  Turn off heat, stir in cheese until melted.  Stir noodles into cheese sauce and pour into a 2 qt. casserole.  Add a layer of grated cheese and then top that with a layer of buttered toasted bread crumbs or cracker crumbs.  I like a sprinkle of Italian seasoning in the cracker crumbs.  Bake at 350 for 20-25 minutes until bubbly.

I hope you enjoy it.  I highly recommend paring this with green beans and stewed tomatoes.

What meatless meals do you enjoy?

Friday, October 30, 2009

Monster Slime!

Here's a cooking craft activity that would be fun any time of year but we did it today to celebrate Halloween with our friends.


This recipe came from a book called Loo-Loo, Boo, and Art You Can Do by Denis Roche.  It is a sweet book written for middle elementary kids who can read and craft on their own.  But when I saw the recipe for "Stinky Clay" I knew we had to try it too.

We renamed the "Stinky Clay" monster slime (this has to be said in a spooking voice for full effect) and spent quite awhile making it and playing with it.


We did this activity sitting around the dining room table.  We took turns stirring, touching, smelling, measuring and pouring.  Then we each got our own to knead to the right consistency.    The kids learned about texture and consistency as we had to keep adding flour to get it just right.  They also learned about colors and coloring mixing.  When Chad asked Addy about the MONSTER SLIME several hours later she told him mostly about the colors we added and what happened to the slime as we added more colors.


This made just the right amount to be split three ways.  If there were more kids I'd double the recipe or do it twice with separate groups so everyone could enjoy!


I didn't get any pictures taken but will try to add some of Addy playing with it tomorrow.    We had to make more on our own to get pictures but it was fun the second time too.

Stinky Clay
3 TBL baking powder
1/2 cup pickle juice or vinegar
1 - 1 1/2 cup of flour
1 TBL vegetable oil
food coloring or poster paint

Put the baking powder in a large bowl.  Add the vinegar/pickle juice.  Watch it fizz!  Mix in the flour and oil until it is soft but not too sticky.  Add colors until it is as ugly as you want it to be.  Ours ended up an appropriate purple-green.  Store it in an airtight container or plastic bag.

Saturday, October 3, 2009

Fall has arrived!

It's Saturday again and we made another big breakfast.  I promise that my next post will not be about breakfast but I couldn't resist trying pumpkin pancakes this morning. They turned out well so I want to share them with you.


Addy has come to expect cooking on weekend mornings. She climbed into her Learning Tower first thing this morning and started to dig into the spice drawer.  Most of the cabinets at her level are still safety latched but I keep the towel drawer, the kids cup drawer and the spice drawer open for her. It definitely provides her with a sense of accomplishment when she can get out what she needs.  The cup and towel drawers are at her level.  She has to be in the tower to get to the spices.


Even if you don't do a lot of cooking with your kids I recommend letting them have some autonomy in the kitchen so that they learn to do things on their own.  Just be clear and realistic with your expectations.  For example, if your child is going through the stage where they have to take everything out of the container and strew it around, only keep a few cups in the drawer.  Otherwise you'll be picking up and washing way too much.  Once they've passed that you can keep the drawer full.

Yesterday we went to a local pumpkin patch with some of our friends.  We didn't pick any pumpkins put we did pose with them for pictures.  Maybe that's why I had pumpkin on the mind this  morning.  These pancakes start with the basic pancake recipe that we like so I'll list that first with the pumpkin addition at the end.  We served them with whipped cream bananas and honey.  I like walnuts on mine but Chad and Addy skipped that part.


The original part of the recipe comes from the Betty Crocker cookbook.

Pancakes
1 large egg
1 cup all-purpose flour/ replace up to half with whole wheat flour
3/4 cup milk
1 TBL brown sugar
2 TBL vegetable oil
3 tsp baking powder
1/2 tsp salt


Beat egg until foamy.  Add the rest of the ingredients and mix until smooth.  (You can use an electric mixer but we use a whisk so Addy can do the stirring safely.)  Let the mixture rest a few minutes while you heat the griddle to medium heat.  When you drop a few drops of water on the griddle they should jump around.  Cook pancakes until bubbles form on the first side then flip until evenly brown.


Pumpkin addition:
After beating the egg until foaming add:
1/3 cup pumpkin puree
1 tsp cinnamon
1/4 tsp allspice
1/4 tsp cloves
grated nutmeg
1 TBL brown sugar


Finish mixing with other ingredients and cook as described above.


What do you do to celebrate fall?

Thursday, September 24, 2009

Bamper's Waffles


Weekend breakfasts are big around our house.  During the week we eat quick healthy breakfasts but on the weekend we enjoy spending time together in the kitchen creating.  This Sunday we made waffles.
We use the Betty Crocker cookbook and it is the same recipe my dad has always made. My parents go by Bamper and Bammer for now, so we'll call these Bamper's waffles. Chad was in charge of the bacon and the photos, while Addy and I made the waffles, cut the berries and whipped the cream. Addy stayed with us in the kitchen throughout the whole process. 


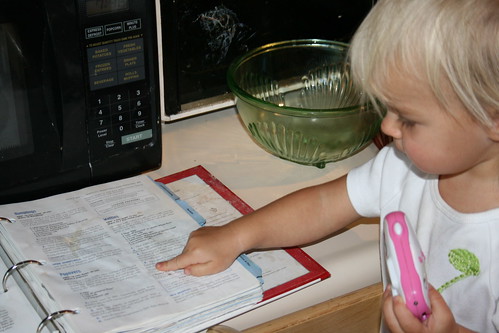
As she has begun to notice writing in books I have begun to keep the recipes within her reach and ask her to read me the next step.  Obviously she isn't reading yet but knowing the significance of print is a big pre-literacy skill.


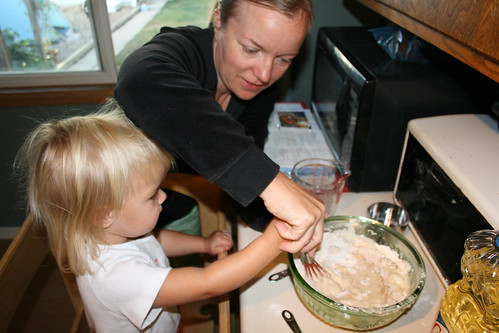
We started with the mixing.  She is really getting the hang of careful stirring, especially if I talk her through it.  Telling her how to hold her hands and how quickly/slowly to go.  When the bowl isn't very full I can let her stir on her own and but as we get towards the end of the recipe I like to keep a hand on the bowl.


We replace up to a cup of all purpose flour with whole wheat flour.  It adds health benefits as well as a nice nutty flavor that we like.  You can mix these with a hand mixer but since Addy was helping we just did it all with a whisk.

Bamper's Waffles
2 large eggs
2 cups all-purpose flour
1 3/4 cup milk
1/2 cup vegetable oil
1 TBLS brown sugar
4 tsp. baking powder
1/4 tsp salt

Beat the eggs until fluffy.  Add remaining ingredients and beat until smooth.
Heat waffle iron while you are whipping cream and cutting strawberries.  Our waffle iron takes 2/3 of cup of batter at a time but this may vary depending on the model that you use. You can use the batter later on in the week but I like to make all the waffles and then freeze the extras.  They heat up well in the toaster oven.  The kids devoured the extras for lunch yesterday with plain yoghurt, honey and berries on them.


This time Addy wanted to help cut the berries.  I removed the tops and then she helped chop them using one of her knives.  I think she ate as many as went into the bowl.
Our breakfast was delicious and gave us plenty of energy for the rest of the morning.  Here is Addy playing "secret garden" in our back yard.


Monday, September 14, 2009

Our Weekly Bread

Since moving to Colorado and not having to return to work I have found the time and the inclination to bake our own bread.  Or maybe it is just because I love using my Kitchen Aid stand mixer.  Either way I know that Addy really enjoys helping make bread.  We make a yummy honey oatmeal recipe once a week and occasionally other types of bread. I like the idea of homemade bread because there are no additives and I can make it organic without paying the high price of natural bread.  I create less waste because we can reuse the bread bags.

This is definitely one of the times that I have to suspend my desire for a clean kitchen.  Making bread with a toddler is MESSY.  However the learning that she does and the finished product make it totally worth it.  Addy loves to taste all of the ingredients.  I usually give her a tiny taste of each as they go in, but I have to watch the flour because she would eat it by the handful.  She usually ends up with a fine coating of it anyways.  She is just getting to the point where she can roll out the dough and is starting to try to shape the loaves.

I have found that although this recipe may turn out best when it is followed pretty closely there is some room for flexibility.  For instance the rising times often are shorter or longer than recommended but the bread still turns out tasty if not beautiful.  This past week we made the dough then went for our run.  We stopped at the park on the way home and the bread rose for over an hour and a half on the first rise.  By then we were pushing it to get it baked by the time we had to leave the house for the day so I only let is rise about 30 minutes for the second rise.  It worked, they aren't the lightest fluffiest loaves we've had but they ended up a nice shape.  I also just let it rise in the first time in the bowl I made it in rather than greasing a clean bowl as recommended.

When we first started making our own bread we went through it more quickly.  Now that we are used to it we go through about two loaves a week.  I store one in the freezer and then defrost it on the counter when we need it.

I've just started looking for a local source of flour but currently I just use whatever organic brand is on sale.  I use local honey and good quality butter and oats.

This recipe came from the cookbook that came with my Kitchen Aid.

Honey Oatmeal Bread
1/3 cup unsalted butter
1 1/2 cup water
1/2 cup honey
1 cup organic whole wheat flour
4-5 cups organic white flour
1 cup oatmeal
2 tsps salt
2 packages yeast or 4 1/2 tsps.
2 eggs

Heat the butter, honey and water together over low heat until 120-130 degrees.  Use a thermometer!   Otherwise you risk not allowing the yeast the proper environment.  Put the oatmeal, whole wheat flour, 3 cups of white flour, salt and yeast in the mixer bowl.  With the dough hook on, mix on stir setting for 15 seconds. Slowly add liquids and mix for about a minute.  Add eggs one at a time until incorporated.  While mixing on level 2 slowly add the rest of the white flour about a 1/2 cup at a time until the dough pulls away from the sides of the bowl and clings to the dough hook. That should take about 2 minutes.  Then knead on level 2 for two more minutes.  Scrape sides of bowl clean and form dough into a nice ball.  Place in a cold oven and allow to rise for about an hour.  Dump onto lightly floured surface.  Divide evenly.  Roll out into a rectangle and then roll up into a log tucking the ends under.  Place in lightly greased bread pans. Put back into cold oven to allow to rise again for about an hour.  Turn convection oven to 350 and set timer for 30 minutes.  You don't have to take the loaves out while the oven heats, just leave them in there.

You could make this recipe without a stand mixer.  Just read a recipe for making bread by hand and follow those instructions using these ingredients.

French Toast made with this bread is awesome!

Tuesday, September 8, 2009

Fresh from the garden pesto

Lest you think we only bake here, today we made pesto.  After a quick run and some playtime at the park Addy and I hit the garden.  We picked all the basil and stripped the leaves from the stems.  Addy helped pick and pluck for awhile and then went off to draw with chalk.  Although her figures are just lines, today was the first time I heard her talking about what she was drawing without me prompting.  It was nice to sit beside her with my hands busy but my ears open to what she was contemplating.  We were able to really take the morning at her pace even while getting a task accomplished from my list.  I find that it really helps her behave well if part of the day she gets to set the pace.  Since we had a busy afternoon planned I made sure to follow her lead this morning.

About the time I was done stripping the basil, she was ready to head in for a snack.  She ate a popsicle made from this morning's smoothies while I toasted pine nuts and walnuts together just until they had just a little more color.  Then she helped me with the blender.  We chunked the Parmesan cheese into it and grated it up then poured it out into a separate bowl to be able to measure it for the multiple batches.  Then we ground up the nuts in the blender and dumped them into their own bowl as well.  I think this would be easier to make in a food processor but I don't know since I don't actually have one.  My blender had to work pretty hard to make the thick paste that I like.  However it did persevere and we were able to make 3 batches of pesto using up all the basil.  Each batch makes enough for two pasta meals so I froze 5 small bags of pesto and saved one portion for tonight's dinner.

While we made the pesto Addy tasted and smelled each ingredient.  She didn't like the cheese but did enjoy the walnuts.  She liked the smell of the basil but said the garlic was too spicy.  As a whole though she likes pesto.  She enjoyed it fresh on some pretzels this morning and really gobbled it up on the ravioli tonight.  This is another example of how she gets to use her five senses while cooking.  With older children you can talk about senses and the science behind them as you cook.

Basil Pesto:

2 cups packed fresh basil
1/2 cup walnuts or pine nuts or a combination
1/2 cup grated Parmesan cheese
1/3 cup olive oil (if your blender balks you can always add a little bit more oil)
2-4 cloves of garlic (our garlic is a little on the small side so we used four cloves)
salt to taste

Blend until smooth. Refrigerate or freeze.  When you serve it with pasta you can stir in some of the pasta cooking water to make it more saucy.  It does tend to oxidize so cover with plastic wrap touching the surface if you are storing it in a bowl or smooth all of the air out if you are storing it in a baggy.

Friday, August 28, 2009

"I want to cook."


Yesterday Addy and I spent the day here at home with her cousin. He'll be three in a few months. After nap as we are just getting ourselves together and planning the rest of the afternoon I ask them what they want to do. After a few suggestions from me, Braden adamantly announces he wants to cook. Well good. We'll cook then. I give him a few choices of what we could make based on the ingredients available. He picks chocolate chip cookies. Now I do feel somewhat guilty about making such a sweet project but ultimately the kids like baking and there are plenty of steps for turn taking and ingredients for tasting, touching, and smelling.

It took me a while after moving here to find a recipe that didn't fall flat. For me the "tried and true" recipe on the back of the chocolate chip bag just couldn't handle the altitude. The recipe below is a based mostly on the recipe on the shortening container. I don't like to use a lot of shortening for health and flavor reasons but I think it makes the cookies stay a nicer shape and texture. There is more flour in my version than the original version. I find that I need it unless I want a really flat cookie.

Chocolate Chip Cookies:

preheat convection oven to 350 or regular oven to 375

2 1/2 cup flour
1 tsp salt
3/4 tsp baking soda
1/4 cup butter flavored shortening
1/2 cup unsalted butter
1 1/4 cup brown sugar
1 egg
1 TBLS vanilla
2 TBLS milk
1 1/2 cup chocolate chips (substitute part of this with nuts if you like them)

Sift the dry ingredients together and set aside. Cream together the butter and shortening. Add the sugar and beat until fluffy. Add the egg, vanilla and milk and beat until combined. Stir in the chocolate chips/nuts. Bake for 8 minutes for a chewy cookie and 10 for a crunchy cookie. Keep the dough in the fridge in between pans. This way it stays firmer and it isn't so tempting to eat as when it is just sitting on the counter.

The kids really got into taking turns yesterday as well as smelling and touching each ingredient. We also compared the different sizes of measuring spoons and how much of each ingredient we needed. We touched on science concepts as they watched the lumps of dough melt into cookie shapes in the oven. We had fruit and yogurt for snack and then a cookie for dessert. Each kid was happy with just one cookie so I think it really was the process more than the product that Braden was asking for.

Monday, August 24, 2009

Morning Smoothies or Popsicles

This morning was definitely a smoothie morning. You can tell when it's time for a smoothie breakfast if it is already getting warm when you let your dog out into the yard.

This recipe is less about the amounts and more about the order of things. So with Addy I tell her the steps before we start and then see if she can help me remember all of the ingredients as we go along. Then of course I let her press the button on the mixer. This accomplishes a couple things. First if the noise is a surprise it scares both her and the dog. If Addy presses the button only Suka gets startled. It also helps with her fine motor skills and hand strength as the buttons are pretty tight on our blender. I bet all toddlers love to press buttons and this lets her see, hear, and taste the outcome of her button pushing.

We have used this "recipe" for a few years now. It originally came from a pamphlet about cooking with honey from the Indiana Beekeepers Association. This fills two large glasses and a small sippy cup or bowl for Addy.

1. fill blender half way with frozen fruit of your choice (it was strawberries for us this morning)-frozen fruit means you have a nice cold smoothie and didn't have to add ice
2. drop in frozen banana-fresh will do here and allows for more hand eye coordination development as Addy had to break the banana and then reach up and drop each piece into the blender
3. a large dollop of yogurt-we like vanilla yogurt in the smoothie but you could always add a splash of vanilla and plain yogurt
4. a dollop of honey
5. add a milk of your choice to the 5 cup line (soy milk is great in smoothies)
6. blend until smooth

We had ours with a piece of toast to make a balanced and filling breakfast. Sometimes I add nutritional boosters like flax or brewer's yeast flakes. We didn't have any on hand so we skipped that step today.

If you don't want them for breakfast or have some left over, pour them into popsicle molds, freeze and enjoy. Addy sometimes doesn't like yogurt but I've found that she loves popsicles made with yogurt. Often I'll just mash some fruit into plain yogurt add a little honey and cinnamon and freeze that for her. She loves it and it is a great way to get more nutrients into her snacks.